


7000 downloads and up! Thank you for your support!
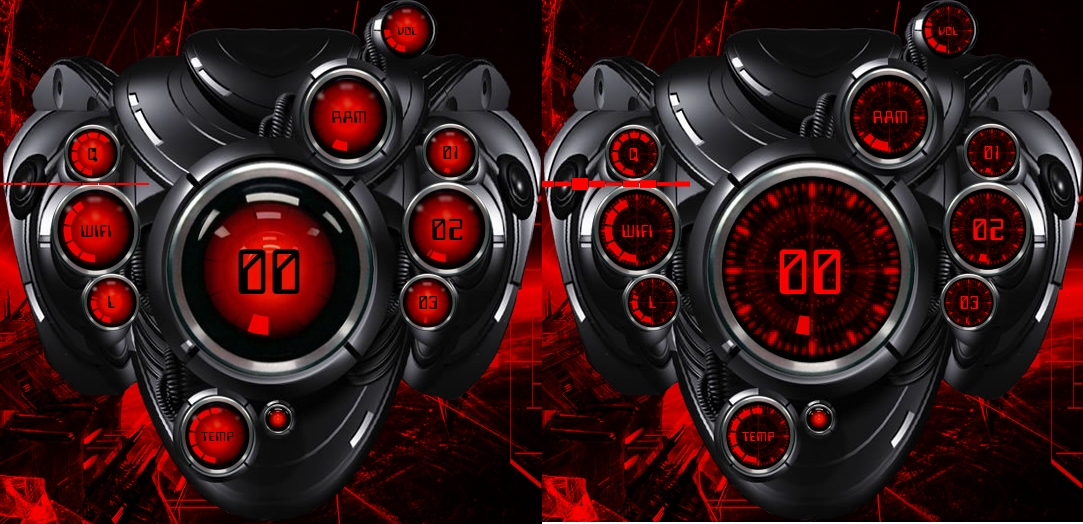
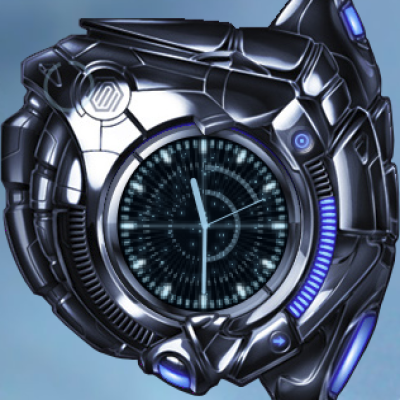
Conky Sentinel by Tuxkernel
Based in Mech-Tex 1000 SuperKaramba Theme by Scibior
http://kde-look.org/content/show.php/Mech-Tex+1000?content=34216
Based in Legacy Conky by *UBUNTICO
http://malbzamora.deviantart.com/art/Legacy-Conky-190498842
Watch Conky Sentinel v1.6 in action and play in HD (Youtube)
http://www.youtube.com/watch?v=EGpeNUAL95w
Installation:
1.- Open a Terminal (Applications-Accesories-Terminal) and type:
sudo apt-get install conky-all lm-sensors hddtemp netcap
2.- Download and unzip Conky Sentinel theme
3.- Rename Conky folder to .Conky
4.- Go to .Conky/sentinel/font/ and install all truetype fonts.
5.- Now, just copy .Conky folder to /home/YOURUSERNAME/
6.- Go to System-Preferences-Start_Applications. Add. In dialog Box (Command) just write: sh /home/YOURUSERNAME/.Conky/start_conky.sh
7.- Reboot. Now, Conky Sentinel is running!
If you have problems with installation, write me or reply me. Comments are welcome and vote, please!
Enjoy!
Greatings!
Tuxkernel ...
NOTE: Originally Conky Sentinel was prepared for 1366x768 resolution but has been adapted to others resolutions. Obviously, you can touch the code for your optimal resolution. If you want to show Audacious Cover on your desktop, don't forget rename your album cover into music folder to "folder.jpg". If you want receive facebook notifications in Conky go to http://www.taringa.net/posts/linux/12952099/notificaciones-de-facebook-en-conky.html and follow the tutorial.
* NOTES ABOUT CONKY SENTINEL RELOADED.
Conky Sentinel Reloaded is using 01.png background image by default. If you want use the other image (02.png), do this:
* Open a terminal and type:
sudo gedit .Conky/sentinel-reloaded/config/conkyrc1
In this file, find "01.png" and change to "02.png" (Remember, no quotes).
Below, find "{color black}" and change to "{color red}" (Remember, no quotes)
Save and exit. That's all.
* HOW TO CHANGE PICS IN A NEW DESKTOP PICTURE SCREEN (This feature is available only in Conky Sentinel 1280x1024 resolution)
* Go to .Conky/sentinel/pics and select your favorite logo o picture. If don't like these pictures, just drag your best pictures -dad, mom, pet, girlfriend, etc- from your database pictures. Then;
* Open a terminal and type:
sudo gedit .Conky/sentinel/config/conkyrc18
At the bottom, just change "debian.png" for other.
Some examples:
${image ~/.Conky/sentinel/pics/tux.png -p 0,0 -s 128x128}
${image ~/.Conky/sentinel/pics/gnu.png -p 0,0 -s 128x128}
${image ~/.Conky/sentinel/pics/YOUR_NAMEFILE_PICTURE -p 0,0 -s 128x128}
Save change and exit. That's all.
Greatings!
Tuxkernel...
This theme looks better with:
* Alienware Darkstar Theme:
http://gnome-look.org/content/show.php/Alienware+Darkstar?content=118446
* Alienware_BREED_Icons:
http://gnome-look.org/content/show.php/Alienware_BREED_Icons?content=152016
* Winamp Nucleo Alien Mind Skin:
http://www.winamp.com/skin/nucleo-alienmind-v5/145489
or Alienware Darkstar VLC Skin
http://www1.videolan.org/vlc/download-skins2-go.php?url=Alienware%20Darkstar.vlt
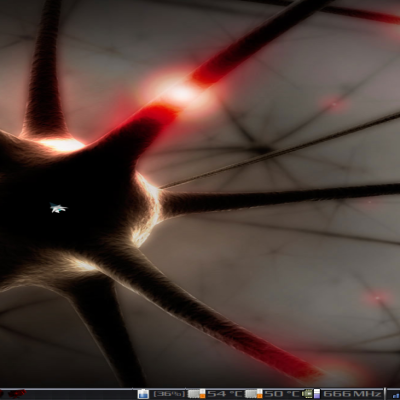
* Battleship Wallpaper H

http://rovergida.deviantart.com/art/Battleship-Wallpaper-187034294
* Impulse - PulseAudioVisualizer Screenlet:
http://gnome-look.org/content/show.php/Impulse+-+PulseAudio+visualizer?content=99383
* Powder X11 Mouse Cursor:
http://gnome-look.org/content/show.php/Powder?content=109306
* Exploting Planet Skydome Animated (Compiz Fusion Skydome):
http://gnome-look.org/content/show.php/Exploding+Planet+Skydome+Animated?content=121086
* Alienware Firefox Persona:
http://www.getpersonas.com/es/persona/143251
* Stanley Jobson Tribute (for background Terminal):
http://gnome-look.org/content/show.php/Stanley+Jobson+Tribute?content=151801
or cmatrix console screensaver
http://www.asty.org/cmatrix/
* Alienware Invader 02 Sounds For GNOMenu:
http://gnome-look.org/content/show.php/Alienware+Invader+O2+Sounds+For+GNOMenu?content=150299
* Blue Vision (desktop-login.ogg):
http://gnome-look.org/content/show.php/Blue+Vision+%28desktop-login.ogg%29?content=152162
or
* Alienware M11x-R2 (desktop-login.ogg):
http://gnome-look.org/content/show.php/Alienware+M11x-R2+%28desktop-login.ogg%29?content=150168


Ratings & Comments
40 Comments
Amazing work. I saw this theme on YT but I have questions: 1. Is it work on Debian Jessie 64 bit? 2. Can I install this theme by Conky Manager v2.4? Regards. And again great work mate.
Do you have a Conky Sentinel download for 1920 x 1080 resolution using Linux Mint 17 Qiana OS? My computer is an Asus N75SF with an 4 core Intel i7-2670QM @ 2.2 GHz. Thanks for everything.
I'm sorry :-( Conky Sentinel only is avaliable for 1366x768, 1280x1024 and 1280x800 screens resolutions. But is very easy modify the code for your resolution. Just edit each conkyrc file -with your favorite text editor- and change the axis. Into each conkyrc file you can find the next variables (Example): gap_x 230 gap_y 859 Just up or down these values and save constantly to see results in your screen resolution. That's all. Good luck! Tuxkernel...
Hi, I am new to linux in general and absolutely love what you have done here. The only issue I am running into is my laptop is 1280 X 800 and I have no idea how to get this set to that resolution. Can you please help, would love to have this up and running on my system. Thanks in advance!
Ups! :-( Making a new Conky Sentinel version for 1280x800 resolution, right now! Greatings! Tuxkernel...
Awesome thank you! I cant wait till its done so I can start using this great looking theme!
Ok, sorry for being such a pain but I have downloaded the 1280 x 800 version (thanks a ton for making that!) and have fallowed your instructions to the letter but every time I start my system there is nothing there. Conky was displaying with the regular version, but was just huge. Now I get nothing. Any suggestions?
I uploaded a new version of Conky Sentinel for 1280x800 resolution. Just download and follow the instructions. Enjoy! Greatings! Tuxkernel...
Hi dwilson0914: I resized the LCD Panel-up image. Now looks better. Just download and follow the instructions. Enjoy! Greatings! Tuxkernel...
Hey man, sorry for whatever reason I never got email notification that you replied. I appreciate all the trouble you have gone through to try and get this to work for me, but alas I am giving up. I still get nothing when I follow your instructions. I have done the termingal thing, downloaded the folder and moved it to my home directory and renamed it .Conky, and then created a startup program with the command to go to tht directory. Restart the system and nada...nothing at all. Just guessing it doesnt like my laptop for whatever reason lol
OK so I re-installed Linux on my PC and did a fresh install of Sentinel. Still wasn't working but ended up going into the start_conky.sh file and changing all the sleep timers to 0. Restarted and it came right up. Well mostly. I can not get the upper middle screen to show no matter what I do. Also, the window in the upper left that shows WIFI and the hard-drive etc doesn't show any values in there separate windows..any ideas?
Hi dwilson0914: Change sleep timers to 5 or 10 seconds, no "0". Conky Sentinel maybe not work. WIFI and HD drives: Open a terminal and type: ifconfig Check your WIFI interface. By default, Conky Sentinel is working with wlan0. But if you have eth0, eth1 or other, then go to .Conky/sentinel/scripts/ and open rings1.lua In these file, change this lines: arg="wlan0", to arg="eth0", or arg="eth1", or other. Just change "wlan0" for your WIFI interface. Save and exit. Do the same with .Conky/sentinel/config/conkyrc1 and .Conky/sentinel/config/conkyrc6 In those files, change the lines: ${downspeedgraph wlan0 15,355} ${downspeed wlan0} and ${upspeedgraph wlan0 15,355} ${upspeed wlan0} for your WIFI interface. Examples: ${downspeedgraph eth0 15,355} ${downspeed eth0} ${upspeedgraph eth0 15,355} ${upspeed eth0} ${downspeedgraph eth1 15,355} ${downspeed eth1} ${upspeedgraph eth1 15,355} ${upspeed eth1} etc... Save and exit. That's all. Good luck! Tuxkernel...
Awesome man thanks! Got the WIFI up and running now. The one window still wont show in the upper middle. Believe its conky6. Also, am attaching a link to a screenshot of my setup. I have circled in white the stuff thats not working. One is the /h and / rings as well as the Swap and Battery rings. I have already changed the BAT1 to a BAT0 but that didnt get the ring to work. And is there any way that instead of SWAP i could display my volume level instead? Thanks in advance man, sorry for being such a pain. Link to screenshot below. http://postimg.org/image/ugmd0yhr7/94b74a4f/
Hi dwilson0914: ABOUT LCD PANEL-UP (CENTRAL) How many cpucores do you have? If you don't know, open a terminal and type: cd / cat /proc/cpuinfo Check the lines named "processor" and account the cpucores. Then go to .Conky/sentinel/config and open conkyrc6 Change the lines named: CPU0: ${cpugraph cpu0 11,47} CPU1: ${cpugraph cpu1 11,47} CPU2: ${cpugraph cpu2 11,47} CPU3: ${cpugraph cpu3 11,47} for: CPU0: ${cpugraph cpu0 11,47} <--- SINGLE-CORE CPU1: ${cpugraph cpu1 11,47} <--- DUAL-CORE OR CORE 2 DUO CPU2: ${cpugraph cpu2 11,47} <--- Core i3 CPU3: ${cpugraph cpu3 11,47} <--- etc... Save and exit. ABOUT /root and /home, SWAP AND BATTERY: /root and /home: I thing you have a fresh installation and your HD is empty, or almost empty. Try load many files into HD and look if rings works. SWAP: if you have 2 gigas in RAM memory or more, then swap memory not work for you. This is not a question about Conky Sentinel. This is a question about your Linux system. BATTERY: Open a terminal and type: cd / cat sys/class/power_supply/ ls If you see BAT0, BAT1 or other thing, then edit the lua rings about this conkyrc. CHANGE SWAP TO VOLUME: Of course! Just edit the lua ring about SWAP and change the line: name="swapperc", for name="mixer", arg="Master", That's all. If you are in troubles, reply me. Good luck! Tuxkernel...
Awesome man, was able to get the battery gauge working and you where right about the /h and / gauges. Unfortunately still cant get the LCD PANEL-UP (CENTRAL) to work. OK so when I do the cd / and cat /proc/cpuinfo it says I have 1 processor. in your reply you said... "Change the lines named: CPU0: ${cpugraph cpu0 11,47} CPU1: ${cpugraph cpu1 11,47} CPU2: ${cpugraph cpu2 11,47} CPU3: ${cpugraph cpu3 11,47} for: CPU0: ${cpugraph cpu0 11,47} <--- SINGLE-CORE CPU1: ${cpugraph cpu1 11,47} <--- DUAL-CORE OR CORE 2 DUO CPU2: ${cpugraph cpu2 11,47} <--- Core i3 CPU3: ${cpugraph cpu3 11,47} <--- etc..." But I see no change from what they are to what they should be other than labeling each line with what kind of core it is. Also, changed the lua ring about SWAP to what you said (so that it shows my volume level) but it doesn't register a value no matter what my volume is set to. I am so sorry to be such as a bother and I truly appreciate all the help you have given me
Awesome man, was able to get the battery gauge working and you where right about the /h and / gauges. Unfortunately still cant get the LCD PANEL-UP (CENTRAL) to work. OK so when I do the cd / and cat /proc/cpuinfo it says I have 1 processor. in your reply you said... "Change the lines named: CPU0: ${cpugraph cpu0 11,47} CPU1: ${cpugraph cpu1 11,47} CPU2: ${cpugraph cpu2 11,47} CPU3: ${cpugraph cpu3 11,47} for: CPU0: ${cpugraph cpu0 11,47} <--- SINGLE-CORE CPU1: ${cpugraph cpu1 11,47} <--- DUAL-CORE OR CORE 2 DUO CPU2: ${cpugraph cpu2 11,47} <--- Core i3 CPU3: ${cpugraph cpu3 11,47} <--- etc..." But I see no change from what they are to what they should be other than labeling each line with what kind of core it is. Also, changed the lua ring about SWAP to what you said (so that it shows my volume level) but it doesn't register a value no matter what my volume is set to. I am so sorry to be such as a bother and I truly appreciate all the help you have given me
Hi dwilson0914: ABOUT CPUCORE: Open a terminal and type: cd / cd proc/acpi/processor/ ls Can you see CPU0 or CPU1 or anything? If you have CPU0, then change the lines for: CPU0: ${cpugraph cpu0 11,47} CPU0: ${cpugraph cpu0 11,47} CPU0: ${cpugraph cpu0 11,47} CPU0: ${cpugraph cpu0 11,47} If you have CPU1, then change the lines for: CPU1: ${cpugraph cpu1 11,47} CPU1: ${cpugraph cpu1 11,47} CPU1: ${cpugraph cpu1 11,47} CPU1: ${cpugraph cpu1 11,47} Save and exit. If you can't see changes, rerrun Conky Sentinel instances or reboot you machine. ABOUT VOLUME: I'm stupid. In Linux Mint, the path to VOL has changed. I'm searching how to fix :-( By the moment, try to make changes. I promise reply you as soon I can. Good luck! Tuxkernel...
Your work is of high quality workmanship and originality of style. I recommend to all this work.
Thanks WalentiWalew :-) Greatings!!! Tuxkernel...
I am Walenty Walewski. Thank you.:)
this wallpaper is cool too,I would love to get that wallpaper, Can you supply the link?thanks for your work.
Original wallpaper is here: http://rovergida.deviantart.com/art/Battleship-Wallpaper-187034294 If you want these wallpaper in red color, open it with Gimp. Go to menu "colors", select "colorized", select red color and push OK. Now go to menu "file", select "to export" and save. That's all. Greatings! Tuxkernel...
thank you so much ,it is so kind of you.
Original wallpaper is here: http://rovergida.deviantart.com/art/Battleship-Wallpaper-187034294 If you want these wallpaper in red color, open it with Gimp. Go to menu "colors", select "colorized", select red color and push OK. Now go to menu "file", select "to export" and save. That's all. Greatings! Tuxkernel...
Original wallpaper is here: http://rovergida.deviantart.com/art/Battleship-Wallpaper-187034294 If you want these wallpaper in red color, open it with Gimp. Go to menu "colors", select "colorized", select red color and push OK. Now go to menu "file", select "to export" and save. That's all. Greatings! Tuxkernel...